
How-To
Track time and export a timesheet
Keep actual work time separate from your planned schedule.
Before you start
- Create a task; assign a client or project if you want grouped reports.
Steps
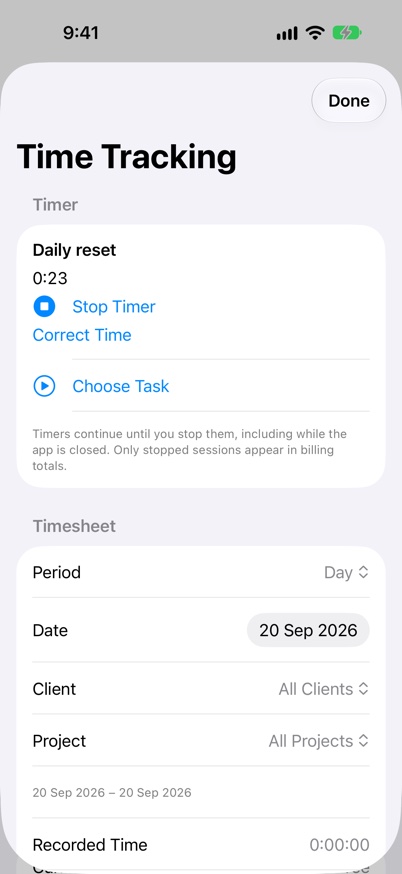
- Open the task’s Track Time action and start a timer.
- Stop the timer when you finish the session. The task stays open until you separately complete it.
- Open Time Tracking from More or Projects & Clients.
- Choose a day, week or month and filter by client or project.
- Review overlaps, correct forgotten start or stop times, add notes and choose whether each session is billable.
- Choose Export Timesheet CSV on iPhone, iPad or Mac and select where to save it.
- A saved running timer continues through backgrounding and relaunch. Stop it before using that session in billing totals.
- Review sessions that cross midnight against each local day. The export includes UTC intervals, record identities, hours and billable status, which can differ from a local display time.
- Reassigning or deleting the original task does not rewrite historical client/project billing labels. Review the recorded session itself when correcting a timesheet.
Confirm the setup is working
- Stopped sessions appear under the chosen period and client/project filter.
- Stopping time tracking leaves task completion and planned duration unchanged.
Running sessions do not enter billing totals until stopped. The dedicated Watch timer requires the latest Watch app; follow the linked Watch guide and check that the Watch app is up to date.
Keep going
Your next useful step
Continue with a related guide or explore how the feature fits your plan.